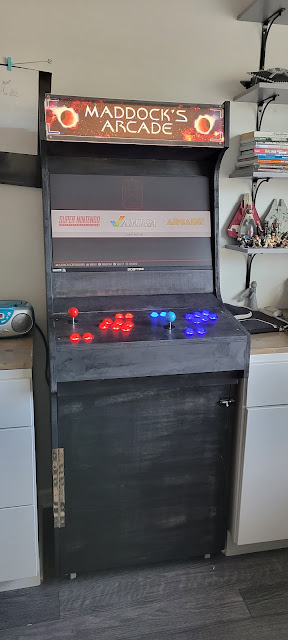
Last Christmas was pretty well spent at home making stuff. The boys had a good time working on one of their Christmas presents with Dad. A custom Arcade. It was a pretty long project as far as DIY projects go. The first step was ordering the electronic parts, including the Monitor. We gifted our teen with these items for Christmas. Then after Christmas they went to work building it. The wood came from our local hardware store. The computer inside is a RasberryPi. The instructions we used to make it came from Medium.com.
After the cabinet was built we stained it with Black Wood stain and sealed it with Polycrylic.
Electronics
20 Hikig LED Push Buttons & 2 Joysticks
2x Easyget Zero-Delay USB Encoder
27” Acer Monitor
Raspberry Pi 3
USB Speaker
Keyboard
Mouse
Hardware
2x Easyget Zero-Delay USB Encoder
27” Acer Monitor
Raspberry Pi 3
USB Speaker
Keyboard
Mouse
Hardware
2x MDF wood 3/4” x 49 x 97”
2x Inset overlay clip hinges
8 x 5/8-inch Particle board screws
L-brackets for support
3” Caster wheels w/ brakes
Mailbox lock for the cabinet
1 1/2” Nails
Wood glue
10” x 18” Sheet of Plexiglas
5 cans of flat black primer
5 cans of black gloss paint
3 cans of pink spray paint
1 can of fluorescent yellow spray paint
Tools
Circular saw
Jigsaw
Drill press with varying Forstner bits
Router
Orbital sander
Milling machine
Cordless drill
Wood clamps
Drill press with varying Forstner bits
Router
Orbital sander
Milling machine
Cordless drill
Wood clamps
My son did most of the electrical work.
We can honestly say the whole family enjoyed this cool gift!
Will reference this link as we pretty much followed it to a T.
Arcade Marque Decal


No comments:
Post a Comment