Tuesday, November 29, 2022

Christmas 2022 House Tour

Welcome to our two days of decorating the inside of our house tour! We spent Black Friday and part of Sunday putting up our Christmas tree and decorating. We spent one full day outside and I'll try to photograph that tomorrow. Most everything has been collected over the years but we have a few new things this year. 

The Entry

One of my favorite little corners is here in the dining room. I found the paper LED tree from World Market and the green Velvet pillow from Home Goods.
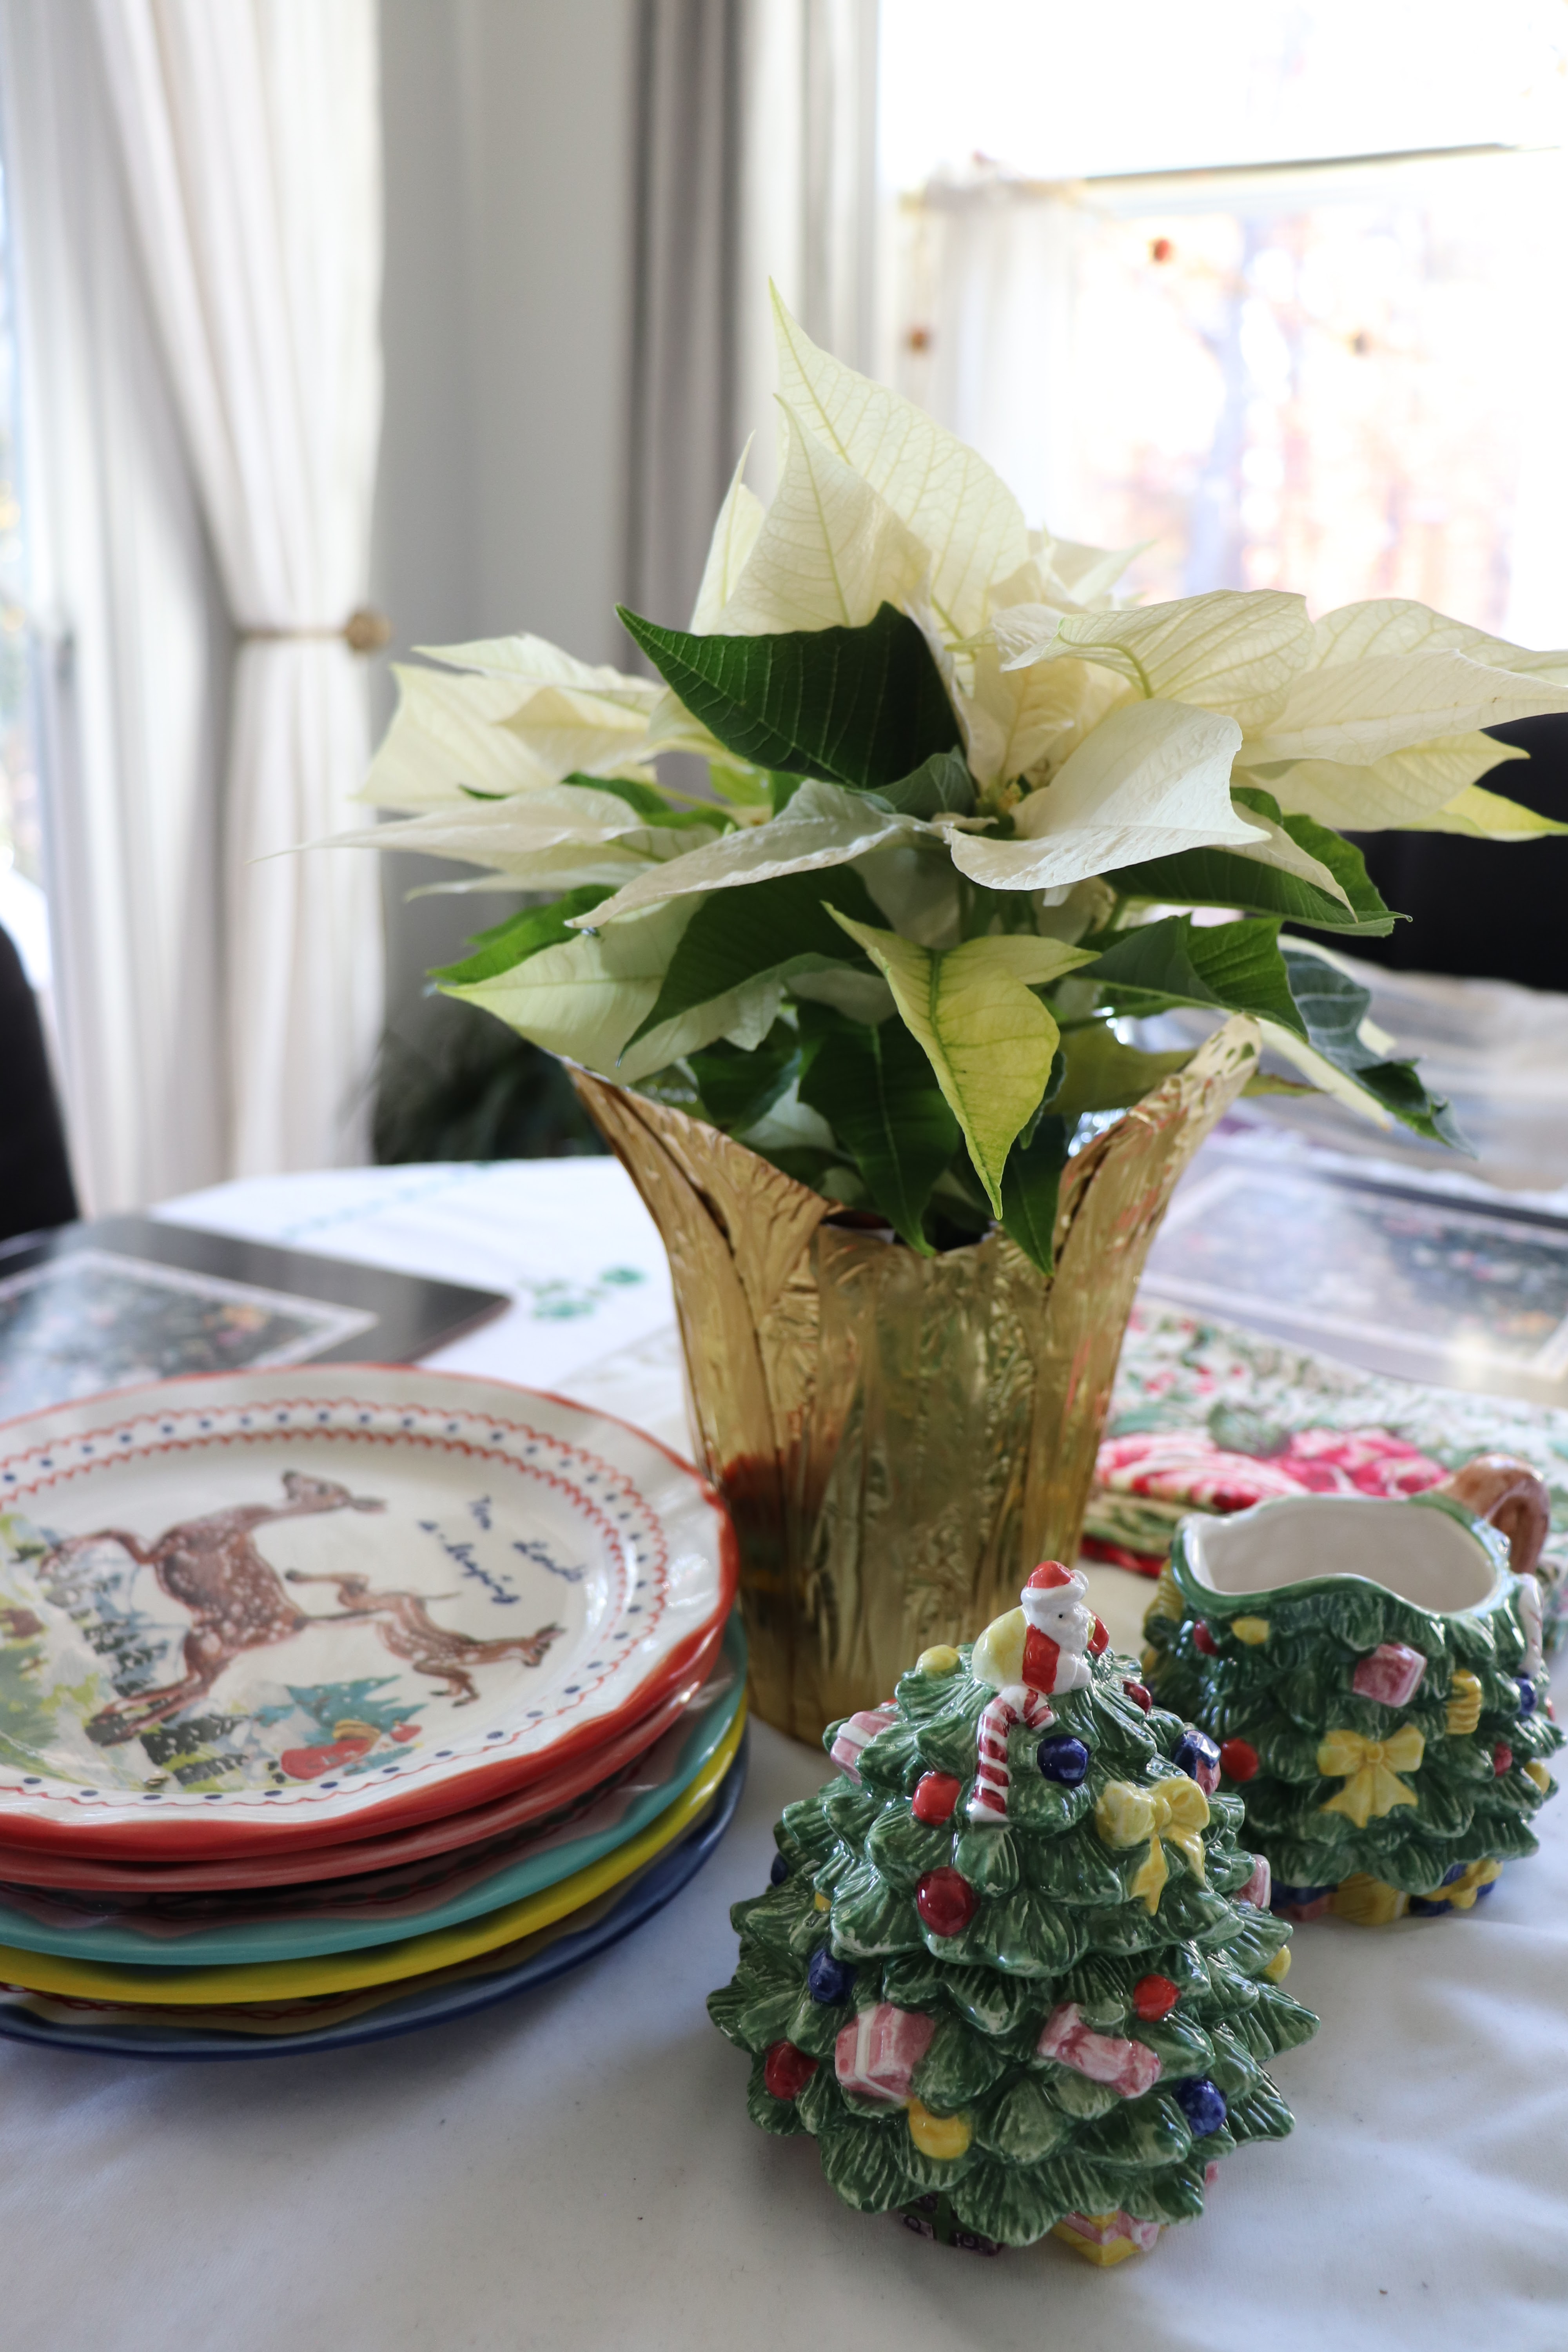

The Dining Room


The Kitchen


It was fun to add our Christmas mugs to our under cabinet hooks this year. We've been making good use of the Santa mugs with our Espresso machine.


The Living Room


The Eat in Kitchen


The Kid's Bathroom

I added a new Christmas Shower Curtain to the Kid's bath. Every room needs to be festive!


The Master Bedroom


I dried oranges slices and made garland for the tree.


Downstairs Bath


Upstairs in the loft I removed the colored lights that came prewired with this tree. That was a long task! I added white LED lights instead.  


My son's little tree

My daughter's pink Flocked tree

My oldest son's tree

Hope you enjoyed our eclectic, vintage, modern Christmas tour!  Sometimes I think we have too much, but then it's also the right amount. Just a lot of work that is worth it in the end.  Now to sit back and enjoy the holiday season!

xo
Cathleen


Sunday, November 27, 2022

Quick Mudroom Makeover

Finally getting around to this small mudroom update.  The AFTER photo:


BEFORE

I painted the wall with Farrow and Ball Aubergine (same as in our daughter's room.) We made a seat out of a piece of plywood leftover from our Murphy Bed Project and added trim.  I spray painted the shoe bins tan with a stone finish.  We changed the hooks from the silver/chrome ones to new brass ones. 


The doors got a paint job in Farrow and Ball's Sulking Room Pink (same as in guest room.) We added a new door handle in Oil Rub Bronze from Lowes. The rug is an early Christmas present from Anthropologie called the Tuft Summit Wool Rug.


Here is a view with the lights off, the color on the wall gets much darker.


The coat closet got two coats as well. 


Hope everyone had a lovely Thanksgiving. I am stuffed!  And now that we are finally done with Christmas decorating I can get back to the gym!

xo

Cathleen

Wednesday, October 19, 2022

Painting a storm door

I decided to give the front door a fresh paint job. It was a dark slate blue to start and I was trying to match it with a color I already had.  This color is a bit more teal but I love the way it turned out.  I replaced the door handle as well and decided to give the storm door the same color. I think it looks better when both doors match.

The original storm door was painted black. It felt like too much of a contrast with the white trim.  The new color is Narragansett Green by Benjamin Moore in the Exterior Soft Gloss Ben Paint.  I sanded the door using 200 grit sand paper and then cleaned it. I taped both the door and the glass off with painter's tape. After that I primed the storm door with Zinsser 1-2-3 Primer.  I let the Primer set for 24 hours and then I did two coats of paint the following day. 


I love the new color so much. I think it's going to look great year round.  

The new door handle is from Lowes and it's called the Baldwin Prestige Torrey Pines Venetian Bronze Smartkey Single-Cylinder Deadbolt Entry Door Handle. How can we go wrong when Joe and I lived in Torrey Pines in San Diego.  Names really have symbolism to me and I always take them as signs.


We have some freezing cold temps over the next few doors so this will remain closed! ❆ 

xo

Cathleen

Monday, October 17, 2022

DIY Garden Posts and String Lights 💡

After a recent Hurricane in NC, I'm looking at you Ian, we had to rethink our patio lighting. One of the old posts we installed in a pot had cracked (my fault for not buying pressure treated exterior wood.) So we decided to add sturdier posts and also extend the lights across the entirety of the backyard.

Here is look at our DIY Garden Posts.


Supplies for DIY Garden Posts:
  • 4″x4″ pressure treated posts (at least 10′ long.) We used 16' posts because our yard slopes and we cut down to size them up evenly.
  • Gravel (enough for a couple inches at the bottom of each hole to prevent the post from rotting)
  • Quick-setting concrete (one 50-lb. bag for each hole; we used Quikrete Fast-Setting Concrete Mix in the red bag which is only around $6 per bag and sets in just 20-40 minutes)
  • Respirator mask
  • Post hole digger
  • Post level
  • 4×4 Post caps (these are the beautiful copper ones that I got from Amazon)
  • Liquid Nails
  • Screw-in hooks
  • Zip ties
  • String Lights (We Used 4 sets)

Optional Supplies:


    Instructions for DIY Garden Posts: 
     
  1. Decide on your post placement.
  2. Dig holes with the post hole digger. Dig to a depth of at least 1/3 of your wood post and a diameter of about 10-12 inches. We used 16' posts so we had 5 feet underground.
  3. Cut your posts to proper height if needed. Our posts are all different lengths but level at the tops.
  4. Add a couple of inches of gravel to bottom of post hole. This will prevent the bottom of the post from sitting in water which can create rotting issues.
  5. Place post in post hole and make sure it’s square and level (use your post level.)
  6. Put on your respirator mask then add the Quikrete powder to the post hole. It’s best to add it slowly all the way around the post, otherwise the pressure of the concrete mix can shift the post out of position.
  7. Add water and mix with a stick. I think we added about one gallon of water per 50-lb bag. We really just jabbed it around for a little bit to let the water get down into the concrete powder. It’s really not a huge deal if you don’t mix it completely since the concrete powder will draw in water from the soil until it has just enough.
  8. Using your post level again, and double check to make sure the post has remained square and level throughout the previous two steps. You only have a few minutes where you can actually move it so be sure to do this right after you add the water!
  9. Repeat for each post hole, then let the posts set for 24 hours.
  10. 24 hours after your posts set, stain them. We used a long pole with a staining pad to reach the tops and make it go quickly. If your post caps have any un
  11. finished wood, you will want to stain them at this point as well.
  12. Add post caps. Liquid Nails adheres well.
  13. Add hooks.
  14. First drill pilot holes, then screw in the hooks. The placement of the pots and lanterns lines up evenly at the bottoms.
  15. Add string lights! I used a zip tie to attach the string lights to keep the line taut and prevent sagging. If connecting more than one string, fold the cords back on themselves and secure with zip ties to keep the spacing the same between all your lights.
  16. Install timer for lights. This is great to have so you never have to turn them on or off. They are great to have at Christmas as well.

We just love the pots and lanterns on the posts. They really give the tall posts lots of character. I added pretty purple flowers called Plectranthus from Lowes. They are an annual so I will have to think of winter plants soon.


Now, off to enjoy the backyard at night. We've been seeing lot of different kinds of frogs lately. I think the pond we made is attracting them.

We hope this tutorial was helpful! 
xo
Cathleen


Related Posts Plugin for WordPress, Blogger...
 

©Copyright PeaHen Pad 2010-2024. All Rights Reserved.