Showing posts with label How to's. Show all posts

Sunday, April 27, 2025

Painted Queen Anne Chairs

I titled this one Back to my same ol' BS because a long time ago I frequently painted furniture. And I know it's so controversial! I get it!  And I totally agree that certain wood furniture, namely Antique furniture, high quality wood furniture, heirloom furniture, etc. should remain untouched. Or at least maintained so it lasts forever.  Certain furniture though, in my opinion is worth giving a makeover. In this case, I found these chairs for $10 a piece at a local online auction house.  I didn't know if they have a maker, in fact I couldn't locate a single name on any of the chairs. So I took that as a "go" for me bringing them a new life. 


As you can see, there was some wear in certain areas and I loathe the existing fabric. I'm just not a primary colors kind of person. The style is Queen Anne but almost with a unique top part that flares. 


And of course, I went to work ordering paint and new fabric.  I was excited to try Anne Sloan's Paris Gray as a base coat and Old White as a top coat with clear wax. I ordered three yards of Waverly Regency fabric from Fabricguru.com. And as much to my surprise when I started to carefully take apart the chairs and take off the existing fabric I found the original label. Statton Furniture, made in PA.  My research suggests these are very nicely made chairs indeed and are considered Heirloom quality to be passed on to future generations. I really started second guessing my need to redo the entire chair.  But I had already ordered my paint and Anne Sloan Paint is not cheap!  Anyway, they are still the same quality chair only now with a French Flare! 

This time around I thoughtfully removed each chair cushion using a flat head screwdriver and pliers and laid each set down in an order so that they could be placed back on the same chair later. Thankfully the batting underneath and black bottom fabric were all in great shape so I just needed new top fabric. The fabric is upholstery grade and it was really helpful to have an electric staple gun to get this job done. I carefully used the old fabric as a stencil and traced the exact size onto my new fabric.  I used fabric sheers to cut out the fabric and then stapled around all the sides making sure my pattern was straight and the corners were tight. 

I used the old black fabric back on bottom and that's pretty much it! Now for the fun part. The painting!


Anne Sloan paint says you don't need to sand or prime or anything, but I am old school so I like to give my surface a good sanding and then a good cleaning with a strong solvent.  Then I clean it to get all the dust off. In this case, I used one thick coat of Paris Gray and let it dry for a few hours. Then I used a lighter coat of Old White. I let that dry overnight.  In the morning I applied a coat of clear wax and let that dry for one day.  Then it was time to lightly sand so that the gray peaked through a bit. In my opinion, if I ever do this again, would be to sand before waxing, but I was following their instructions. Once I was happy with my sanding, I applied another coat of wax. I again let it dry over night.  The final day of this project was reattaching the chair pads with the four screws at the bottom using an electric drill. 

I think it's the season, but I especially love to lighten things up around this time of the year. Who knows, by Fall I may be taking out the black chairs again!  Oh! and with my three yards of fabric, I even had enough left over to make a wide runner for the table. Maybe a little too wide, oh well. 


Someone likes hiding under the table, I wonder if he notices the new chairs! 


 Happy Spring. I better do a garden tour soon as I have so many new plants this year! 

xo

Cathleen

Sunday, February 5, 2023

DIY Pleated Lamp Shade

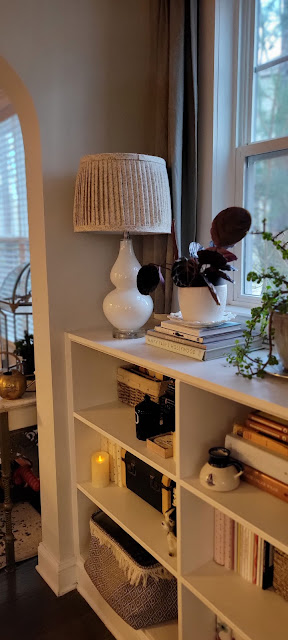
Here's my attempt at making a Pleated Lamp Shade, like all the rage in England and Pinterest. Here was my first attempt using a Rose thrift store fabric.  It gives off a Shabby Chic vibe, not really what I was going for. Upon the first try I learned a few things. First being that my pleats were too big. Secondly that wrapping the excess fabric around the top and bottom left for a messy finish from the inside. And if you're sitting at the right angle you can definitely see the inside. So because I used hot glue, the fabric and trim came off easily.  I have outlined a tried and true method for creating a beautifully finished Pleated Lamp Shade below.

My trial Lamp Shade

Here is the Lamp Shade that turned out better. First pick out a lamp shade that you already own or find another one better suited for your lamp at a Thrift store. It's easy to remove the existing fabric, or do what I did and just leave it there. You still get plenty of light shining through. Next find a cotton fabric that is light weight in a non-fussy pattern. No stripes! That is a nightmare to line up.


So to begin you should get about 3 yards of fabric, and then pin it on both sides after making your folds. Some people skip this step but it ensures you are evenly pleating and that it's straight up and down. 


After you are done pinning, trim off the excess fabric using the edges to keep your scissors straight.  Then take your hot glue gun and run lines around the edges and press down the fabric to the shade.  Remove pins one at a time while also adding a dot of glue to the folds. 


Next create two strips with your fabric and make something similar to bias tape. Using your iron fold in both sides and press.


Then using your glue gun again run a line around the bottom and press your strip down for a finished look. Trim off any string or fabric that sticks out. 


So there you have it. Pretty easy DIY project that gives you that English look for about $30 for two lamp shades.


xo
Cathleen


Thursday, October 17, 2019

Brass is the new Chrome

In our old house, built in the 1980's, I couldn't wait to spray paint all the brass hardware a nice Oil Rubbed Bronze.  It was the outdated kind of shiny brass that was so popular back then.  It's made a huge comeback, but you can tell it looks different now. There is a richness to it and modern lines. Our guest bathroom down stairs keeps evolving. I thought I was finished with it, until it got a new door. An old door to be exact.  I found a nice solid wood door at the Restore in Durham with a pretty crystal doorknob.  I spent a week sanding it, removing old paint with Paint Stripper, and finally adding a shiny gray paint to it.  That's what kick started me to add other hints of pretty brass to the room


The Process of buying an old door and putting it in was a bit more daunting than I expected. First it was slightly too tall. I could not find an exact match, so it needed to be sawed to the correct height.  Then I had to purchase Citristrip, Mineral Spirits, several type of scrapers, sand paper, rubber gloves, plastic sheeting, a big bag of rags, and destroyed a pair of Converse shoes in the process.  This paint stripping process took several tries. The door had about 5 coats of old paint that was tedious to remove. 


You basically paint this Citristrip on and let it sit and do the work. It definitely helps to have the project over plastic because when you scrape the stuff off you need to have clean up be easy.


Once I got most of the paint off with the scrapers, I cleaned it with mineral spirits and began using sand paper to remove what paint remained. Even still you can see by the following photo that it's not completely smooth, but we tried.  Maybe it just gives it character?  We cleaned the brass handle with Brasso to shine it back up.


You won't believe that I actually spray painted every single bit of Chrome in this bathroom gold and ended up then buying more paint stripper and removing some of it later because too much brass was not a good thing either.  For example I painted the edges of the shower gold and it ended up looking like an out dated shower!   This is the inside, where I left it, but removed the outside gold.


Back to Chrome on the outside.


The Shower head, controls and outside handle got several coats of paint, plus a primer and a sealer.

BEFORE

AFTER


PROCESS


PAINTS


My favorite part is the new brass faucet.


I found the vintage inspired rug from Cost Plus World Markets. I never go in that store but decided to see if they had a rug that could tie in the wall color and brass hardware.


If you don't already know, hardware can serve more than one purpose of functionality. It can also be beautiful and decorative. This towel holder from Anthropologist fills that ticket.  Taking down the old towel rod proved to be quite difficult though. I had to cut a piece of wood and paint it the color of the walls to make the new one work as well.

BEFORE

AFTER


I forgot to mention that the new door also has the same color as the walls and now trim too.  We added a gold deadbolt too since the keyhole lock on the outside doesn't work with the old frame.


This little bamboo stool is a nice touch for guests who would like a seat in the shower.  


I'm happy the bathroom is finally finished because using spray paint is highly not recommended (always wear a respirator mask and open the window and run a fan in the window if you can.)

It's almost Halloween time too -this bathroom is going to look quite spooky at night. I need to get out the red lipstick to write something on that mirror.

xo
Cathleen


Monday, January 7, 2019

Anthropologie Queensland wallpaper

Happy 2019! There were a few projects I wanted to complete going into the new year and before my husband's new travel schedule kicked off.   He will be off on new adventures this year so cranking a few projects out was a must.  One of the projects was finishing our dining room. The last little bit was this little cove that I thought was the perfect spot to try our first wallpaper job.  I'm not going to lie, it was daunting, stressful and messy!  There were lots of measurements, trying and retrying, learning how much water to use and when to just give up and use the glue stick!  We also found that this pattern with an 18" repeating pattern left for a lot of waste. 

I first ordered one roll of this paper from Anthropologie called "Queensland" a few months ago. I measured the space and bought what I thought would be enough. With the pattern as it was, we ran out with still one portion of the wall to cover and the ceiling. So I had to order another one of course. 🤦


Hanging wallpaper on the ceiling was the hardest part. We first thought it would be a good idea to do one long strip the length of the ceiling and use painter's tape to hold it up. That didn't work at all, so we cut it in thirds. This worked much easier.  Joe also thought it would be a good idea to mark the plumb line with a string and blue chalk to slap a line on the ceiling.  Then I spent the next 20 minutes with a sponge and soapy water cleaning my rug. Another face palm. Next time, a cloth on the ground would be a good idea.


There are lots of tutorial's online about hanging wallpaper.  They are a must before starting a job like this.  You learn so much.  


I really love how it turned out and it gives this little space a fun unexpected pop of pattern. I happen to love black and white, which goes with everything and doesn't clash with any holiday decor.  I also love this design because the ceramicist, Melanie McEvoy, from Western Queensland and her Maori ancestry, took inspiration from the plant life in New Zealand that face powerful storms and are so resilient.


This angle is laying on the ground staring up. Not a bad view. 


So a fun Before Look at this room: So very different.


This room in total got new paint 1) Benjamin Moore's Paper White in Satin 2) Wallpaper in Anthropologie's Queensland 3) New Rug from Overstock 4) Pink ceiling paint Olympic's Limoge Pink 5) New Light Fixture from Lamps Plus 6) West Elm Gold Curtain Rods 7) White linen curtains that I sewed from Fabric.com. 

Thanks for checking it out. I hope it inspires to you have fun with design and to try something new.

xo
Cathleen

Related Posts Plugin for WordPress, Blogger...
 

©Copyright PeaHen Pad 2010-2025. All Rights Reserved.