Showing posts with label Sewing. Show all posts

Sunday, February 5, 2023

DIY Pleated Lamp Shade

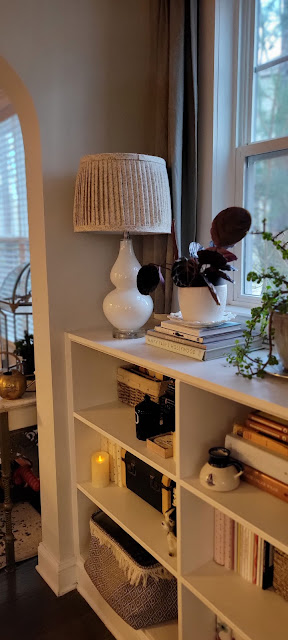
Here's my attempt at making a Pleated Lamp Shade, like all the rage in England and Pinterest. Here was my first attempt using a Rose thrift store fabric.  It gives off a Shabby Chic vibe, not really what I was going for. Upon the first try I learned a few things. First being that my pleats were too big. Secondly that wrapping the excess fabric around the top and bottom left for a messy finish from the inside. And if you're sitting at the right angle you can definitely see the inside. So because I used hot glue, the fabric and trim came off easily.  I have outlined a tried and true method for creating a beautifully finished Pleated Lamp Shade below.

My trial Lamp Shade

Here is the Lamp Shade that turned out better. First pick out a lamp shade that you already own or find another one better suited for your lamp at a Thrift store. It's easy to remove the existing fabric, or do what I did and just leave it there. You still get plenty of light shining through. Next find a cotton fabric that is light weight in a non-fussy pattern. No stripes! That is a nightmare to line up.


So to begin you should get about 3 yards of fabric, and then pin it on both sides after making your folds. Some people skip this step but it ensures you are evenly pleating and that it's straight up and down. 


After you are done pinning, trim off the excess fabric using the edges to keep your scissors straight.  Then take your hot glue gun and run lines around the edges and press down the fabric to the shade.  Remove pins one at a time while also adding a dot of glue to the folds. 


Next create two strips with your fabric and make something similar to bias tape. Using your iron fold in both sides and press.


Then using your glue gun again run a line around the bottom and press your strip down for a finished look. Trim off any string or fabric that sticks out. 


So there you have it. Pretty easy DIY project that gives you that English look for about $30 for two lamp shades.


xo
Cathleen


Tuesday, April 28, 2020

Closet turned Wrapping Paper/Crafting Space

My little crafting corner is complete! This room was once just a game room and the closet just a place to store costumes, CD's, and other random stuff.  After I lost my craft room to my son's new space, I turned this little corner into the crafting/gift wrapping area. I think it's just perfect! I can also sew here too.  Here is sort of the BEFORE, but really it was more "during" when I had to put craft supplies in here during the transition. But you get the idea that it was really just a closet that had I painted earlier and had a plastic clothing rod. 

The first thing I did was unbolt this shelf and remove it.  It left pretty big gaping holes in the wall so I used my Patch N' Paint and filled in the holes. Luckily I also had some touch up paint to cover the holes. After that it was ready.


AFTER!

We sawed off the legs of the brown table top that was in the garage and it fit perfectly in here at exactly 24" deep. We did have to remove the inside door trim to make it fit though. We placed it at Counter Height just above the storage cabinets below. This height of the table makes wrapping gifts way easier on your back.


It's also hardly noticeable but I lined both sides of the closet with wallpaper that I already had left over from the laundry room makeover. Then I added four 2' Rubbermaid shelves with black brackets to either side just above the table top. And additional larger 4' shelf above the wrapping paper holder. Up there I fit a large wrapping paper storage bag that holds Christmas wrapping paper (link below.)


On either side of the table, holding up the table, are these black Halifax cabinets. They were pretty easy to put together and hold tons of gift bags and party supplies.


For some hidden storage underneath the counter I installed some simple bike hooks to hold additional wrapping paper.

I found super cute baskets with wooden hooks to hold additional fabric and crafting materials.


The gray felt bin is my favorite. The simple leather ties are so adorable.


The light fixture is a simple linen shade attached to a light kit you can get online. It plugs in and has an on/off switch. The extra lighting in here was a must.


Because I removed the doors for ease in using this space, I installed a single curtain rod above the door and these pretty drapes. The rod installation didn't go as smoothly as I hoped because I hit something hard behind the wall with my drill about half way into the wall. Only one of my pilot holes was deep enough for the 6 screws that came with the rod. In order to compensate I clipped the dry wall studs with a wire cutter about half way down and used shorter screws. Sometimes you have to improvise and this adds time to any DIY project. 


It was a happy accident too that the drapes play really nicely with the chairs I reupholstered with Scott Living Fabric collection a while back. I must have already known that in my head! 


My grandfather built this beautiful hutch and my Grandmother painted it. It works really nicely to hold even more craft supplies and sewing supplies. I think the muted green works nicely with the wall color as well.

I'm so happy to have my upstairs functioning once again and have a place for the kids to spread out and use this space for their "homeschooling" art projects.  Maybe I should sew a mask or 5 when I have a free minute. :)

Stay well friends,

xoxo
Cathleen

Sources:
Rubbermaid Shelves
Shelf Brackets
Larger Shelf Brackets
Curtain Rod
Curtains
Polka Dot Bins
Gift Wrap Bag
Felt Bin
Chair fabric
Bike Rack Hooks
Black Storage Cabinets

Tuesday, June 25, 2019

Game Room

One week ago we decided to give the Game Room a quick update. We needed to move the computer out of there and into an open spot where we could supervise the kids on it. Now the computer is in our loft and we needed to make a spot for Joe to work from home.  The game room is now more of a Teen Hang out room and also includes a Daybed with Trundle for Sleepovers. Here are some Before and After photos of the space. 

BEFORE

 DURING

AFTER

BEFORE

AFTER


BEFORE

AFTER

In a weeks time I painted the walls Boothbay Gray by Benjamin Moore in an Eggshell finish. Joe added crown molding to the room and we painted the existing bookcase and this one below that was hot pink the same colors as the walls. 


We added new curtains by DKNY wtih cute fluffy gray dots.


The Daybed with trundle is from Joss and Main and the bedding is Kate Spade.  The lamp teal lamp is from Home Goods.


I sewed some cute coral and mint vintage looking floral curtains to hide the games in this bookcase.


The game table was sanded down and painted with Magnolia Home Chalk Paint in "It is well." 


As the kids grow and obtain more games, there is plenty of shelf space for them to organize their things.


Someone is already right to work relaxing and enjoying the bed.


Glad to have this space finished for the meantime and ready for play time this summer.


Happy Summer!

xoxo
Cathleen

Tuesday, June 7, 2016

Breakfast Room - an Actual Breakfast Room!

As you may recall in our old house our little breakfast area was turned into a craft room since the kids mostly sat in there and did arts and crafts anyway. Now that we have a dedicated arts and crafts room in our new home, we now have a wonderful place to sit and eat breakfast. Mostly Joe and I sit here and enjoy Saturday and Sunday mornings together while the kids scarf  down  enjoy their food at the kitchen island.


I scored these black velvet chairs used at Habitat for Humanity, get this, for $7 each! They were having a 75% off sale the day I went in. I cleaned the fabric and used metal polish to polish the metal. In fact, I furnished this entire room from that store!  I should be their spokesperson.


The table was originally brown and I painted it white. The rug is from Target and so is the black and white lamp.

You may recall that this credenza was brown and I got a lot of compliments on leaving it as is. But I couldn't help myself! I had left over chalk paint from the shoe storage unit I painted and again I couldn't help myself. The chalk paint is so fun! No primer needed.  I used the wax sealer on top though to protect it. I love how the little gold feet stand out.


My white fur pillow was a birthday gift from Joe. What great taste he has! I have to add that this table was about $40!


My 1st grader made this little floral wreath on his last day of school. Isn't it so cute? Great little place to dry flowers too.  You can see from my last post with the gallery wall that I changed things up in here. I added new art from Pinterest to some of the frames and found that middle piece frame from Home Goods.


I love that I managed to pull off a shiny black cabinet (also a Restore find for around $60) with gold knobs and so much gold and silver on the table and chairs. Happy accident.


I can't forget to tell you about the white linen Belgium curtains.  I sewed these two panels in a few hours and used Bed, Bath, and Beyond "Umbra" Brass curtain rods and rings. Joe so kindly hung the rods for me. I need another set of curtains for the sliding glass door, but I want to wait until I get some inspiration for them. Maybe I'll make another set of white, or maybe try some pattern. It's funny how I like to leave one set of curtains off in each room, or so it seems.


I also found this cute "Texas" plate at Habitat for Humanity. Black and gold, it must be my thing now.


Joe has managed to fill the liquor cabinet a little. He has to enjoy himself a little between all the home projects.  The blue Heig Club bottle was a gift from me for his birthday in April.


See those cute gold and clear globes in the kitchen? I'm still deciding on whether to keep them or get something more substantial. I think I want bigger pendants and I want to put these elsewhere.


So things left to do in here:
1) Add Crown Molding
2) Find or make curtains for above sliding glass doors

xo
Cathleen
Related Posts Plugin for WordPress, Blogger...
 

©Copyright PeaHen Pad 2010-2025. All Rights Reserved.