We finally surrendered to a 5-year battle with a clogging toilet. No amount of augering or plunging could clear out the mystery clog deep in the toilet. The good news is, our local water/sewer department offers a $100 credit to replacing old toilets (in our case, the original toilet) with new, high-efficiency toilets. Bye-bye, old throne!
If you're curious about the age of your toilet, try this trick that our home inspector taught us. Look at the stamped date under the toilet tank lid: it will indicate the age of the toilet. In this case, 12 March 1987. 25 years seems like a good run for a toilet.
We placed the order for a new
AquaSource WaterSense toilet from lowes.com, then removed the old toilet before making the trip to the store.
First, I shut off the water supply. I can't imagine that you would miss this step, but I might as well put a reminder here.
I then flushed the toilet to empty the tank.
I used an old towel to sop up the remaining water, to minimize spillage.
To help empty the bowl, I added a tablespoon of dishwashing soap to the water, and let sit. When I flushed, the soap lubricated the junk stuck in the clog, helping clear the water from the bowl.
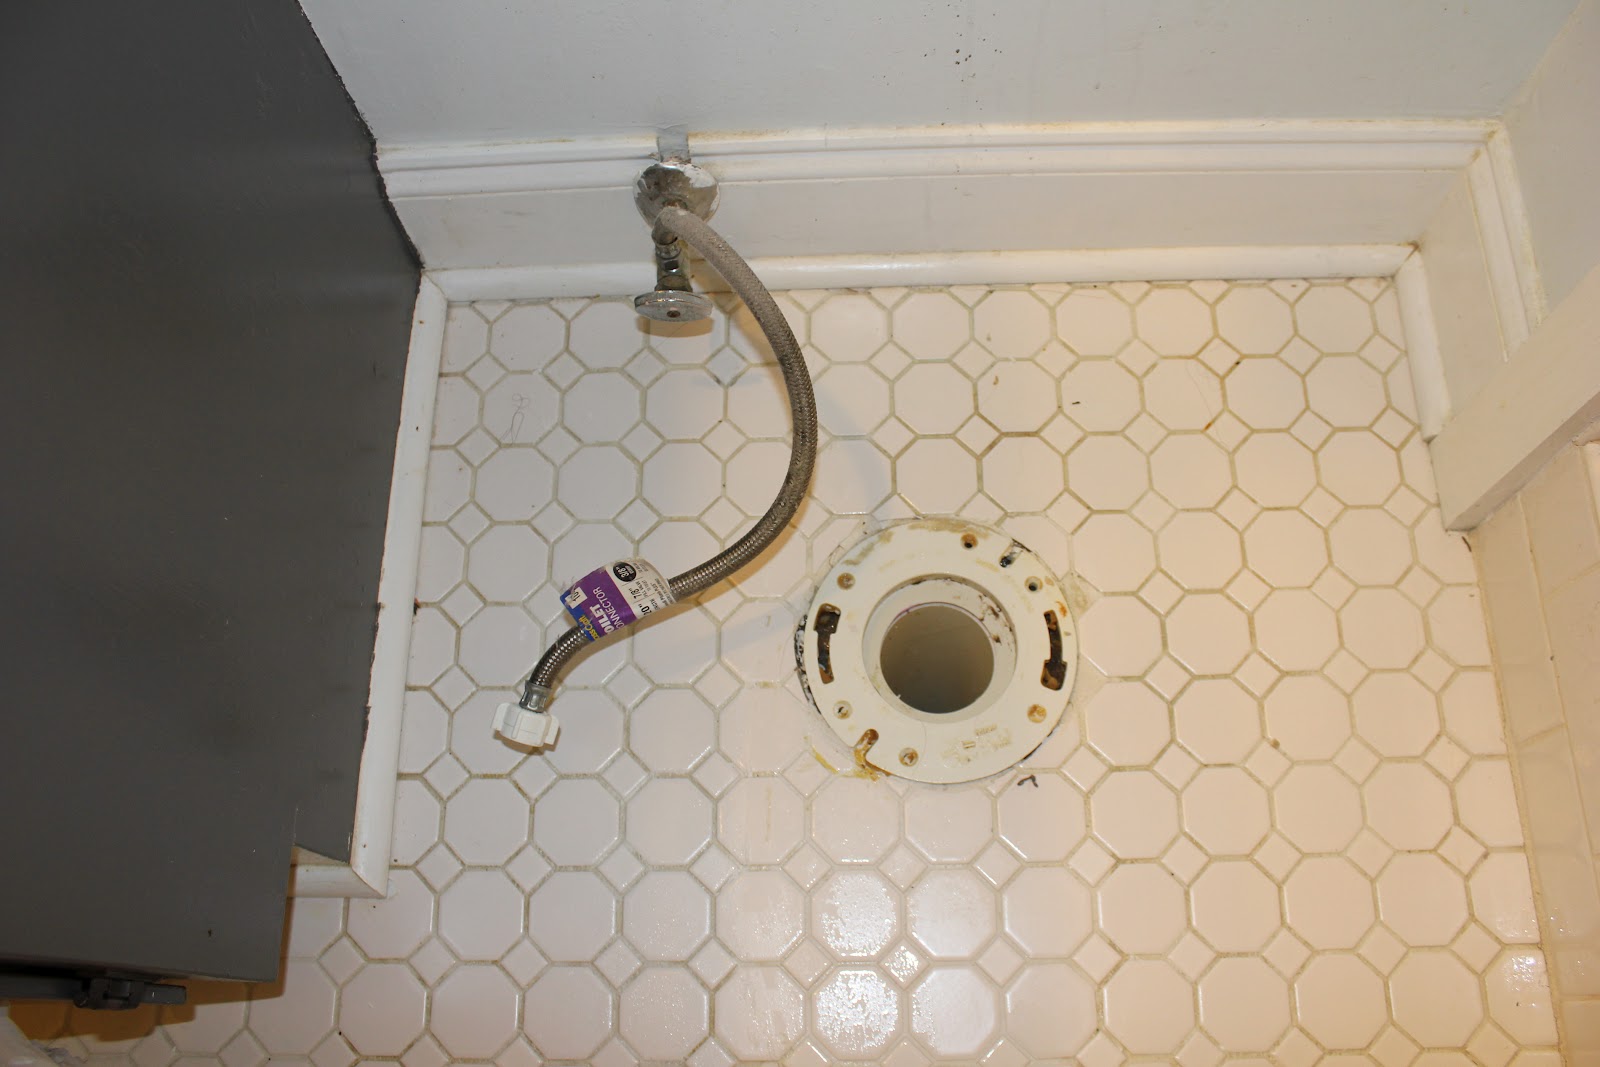
Once the tank was empty, I disconnected the water supply at the tank.
Here's the view from the ground after I disconnected the line. Which reminds me: put a clean towel under your head; the floor under the toilet will not be the friendliest place.
Now, to remove the tank. Long bolts run from the inside of the tank, through the bottom, and anchored by hex nuts or wingnuts on the underside. Don't try to unscrew from the tank-side. You might crack the tank, and the bolts are probably too corroded anyway.
The bolts were fairly corroded, so I shot some lubricant in to try to loosen things up. The left bolt came out pretty easily, but the right sdte was stuck tight.
The installers used wingnuts instead of hex nuts, further complicating the task of loosening the bolts. In the end, I used a locking plier to grab the end of the bolt, and used my plumbing pliers to move the wingnut, one-half turn at a time. It took about five minutes, but thankfully this was the only frustrating part of the job.
After removing the tank, I got another reason to be glad we were replacing the toilet. Blech!
With the tank out of the way, the next task was to remove the bowl. I popped off the caps covering the bolts that keep the toilet in place. Mercifully, the nuts were not so rusted-on as to be a problem. They came off without much effort.
I scraped off the caulk around the base, and a couple of rocking motions back and forth were enough to free the bowl from the floor. All that was left was to scrape the old wax seal away (the big brown circle). But first, I shoved a towel into the hole to prevent sewer gases from coming up the pipe.
Scrapey, scrapey!
While everything was out of the way, I gave the floor a good scrub. including the grooves in the flange (the white plastic disc that is anchored to the ground.)
We went as a family to Lowes, I picked the box up at the front desk, and in the meantime a nice summer storm developed. After herding the kids back into the house through the rain, I dragged the box into the bedroom, then got right to work.
The kids were excited for a new plaything (the box, not the pot).
This kit was a "complete" kit. The quotations are because plastic shims weren't included, which I had totally forgotten about, so I had to make a second trip to pick a pack up. Other than that, everything was included.
I slipped two new bolts into the slots of the flange, trying to stand them up straight.
I unwrapped the new wax ring, and placed it on the base of the toilet, gently pressing to make it stick.
While my assistant guided me, I placed the toilet over the flange, lining up the bolts with the holes in the toilet base. My Home Depot repair manual recommended rocking the toilet back and forth to make a seal with the wax ring. However, the instructions included with the toilet warned AGAINST doing this, recommending instead to twist the toilet while sitting on the top. I honestly don't know which way is better, so I went with the sit-and-twist.
I placed the washers over the bolts, then twisted the new nuts on finger-tight. Then, I checked to make sure that the bowl was in-line with the wall (purely aesthetic, but now's the time to check).
I then stuck some shims under the gaps to stop rocking, and tightened the nuts with a hand wrench. I tried to be careful not to over-tighten, because I didn't want to crack the bowl. I twisted each nut 1/2 turn, alternating between sides, until I didn't hear any sounds indicating shifting when I tried to rock the bowl. I didn't notice an increase in resistance when turning, so I think I was not overly aggressive.
I checked the alignment of the bowl to the wall one more time, just to make sure that nothing had shifted. Then I poured some water in the bowl to check for leaks and prevent gases from coming up the hole. Everything looked good, so I continued.
At this point, I could remove the excess bolt using my hacksaw. This took a couple of minutes, because of the low clearance. I almost used my roto-zip cutting attachment, which would have been faster. However, I was scared that my hand would slip and I might scratch the pretty new porcelain.
Then cap on, nice and sleek.
Now for the tank. I placed the rubber ring around the hole in the base, on the underside.
As carefully as I could, I lowered the tank directly over the hole leading into the toilet base.
I dropped the new bolts through the holes, and screwed the nuts on from the underside, hand-tight.
I then checked the position of the tank relative to the wall and its level, and shifted until I was satisfied. Then I tightened the nuts up from the underside.
There's a slight lip on the rear side of the base that meets the tank, so I tightened the bolts until it was just barely touching on both sides, and level across the top. You can see the slightest sliver of light coming through between the tank and base.
I reconnected the water line to the tank hand tight plus 1/2 turn with a wrench.
I turned the water back on, watching for any leaks along the line, then enjoyed watching my new tank fill up to the 1.28 gallon mark.
Almost full!
I gave a couple of test flushes, then installed the seat.
And there we go! Two hours, and it cost under 10 bucks after rebate (tax and shims). So far, the high efficiency (low-water) aspect has not been a problem. I'm wondering if this is partly because we were so used to the glacial flow of our old, perpetually clogged toilet that this new one seems to be cleared under vacuum.
And that's the story of our $10 toilet. Isn't she pretty?
Joe


2 comments:
Who needs a plummer? Just call Joe !!
Great Job Joe. HaHa , I am remembering the first toilet we replaced here. Found pencils had been flushed (for fun?) .
It always amazes me what Joe can do...certainly saves us a lot of money. Hmmm, pencils in the toilet! It wasn't me! LOL.
Post a Comment